April 22nd, 2016
Easy Wrap Ponytail Extensions
Hello Gorgeous!
I'm Makenna, and today I'll be sharing with you how I like to put in my Cashmere pony tail! This pony tail is perfect for the gal on the go who still wants to look beautiful and put together! Despite your natural hair, this pony tail will give you a long luscious pony every time. It's a go to of mine for days when I have less than 5 minutes to do my hair. Enjoy! xo
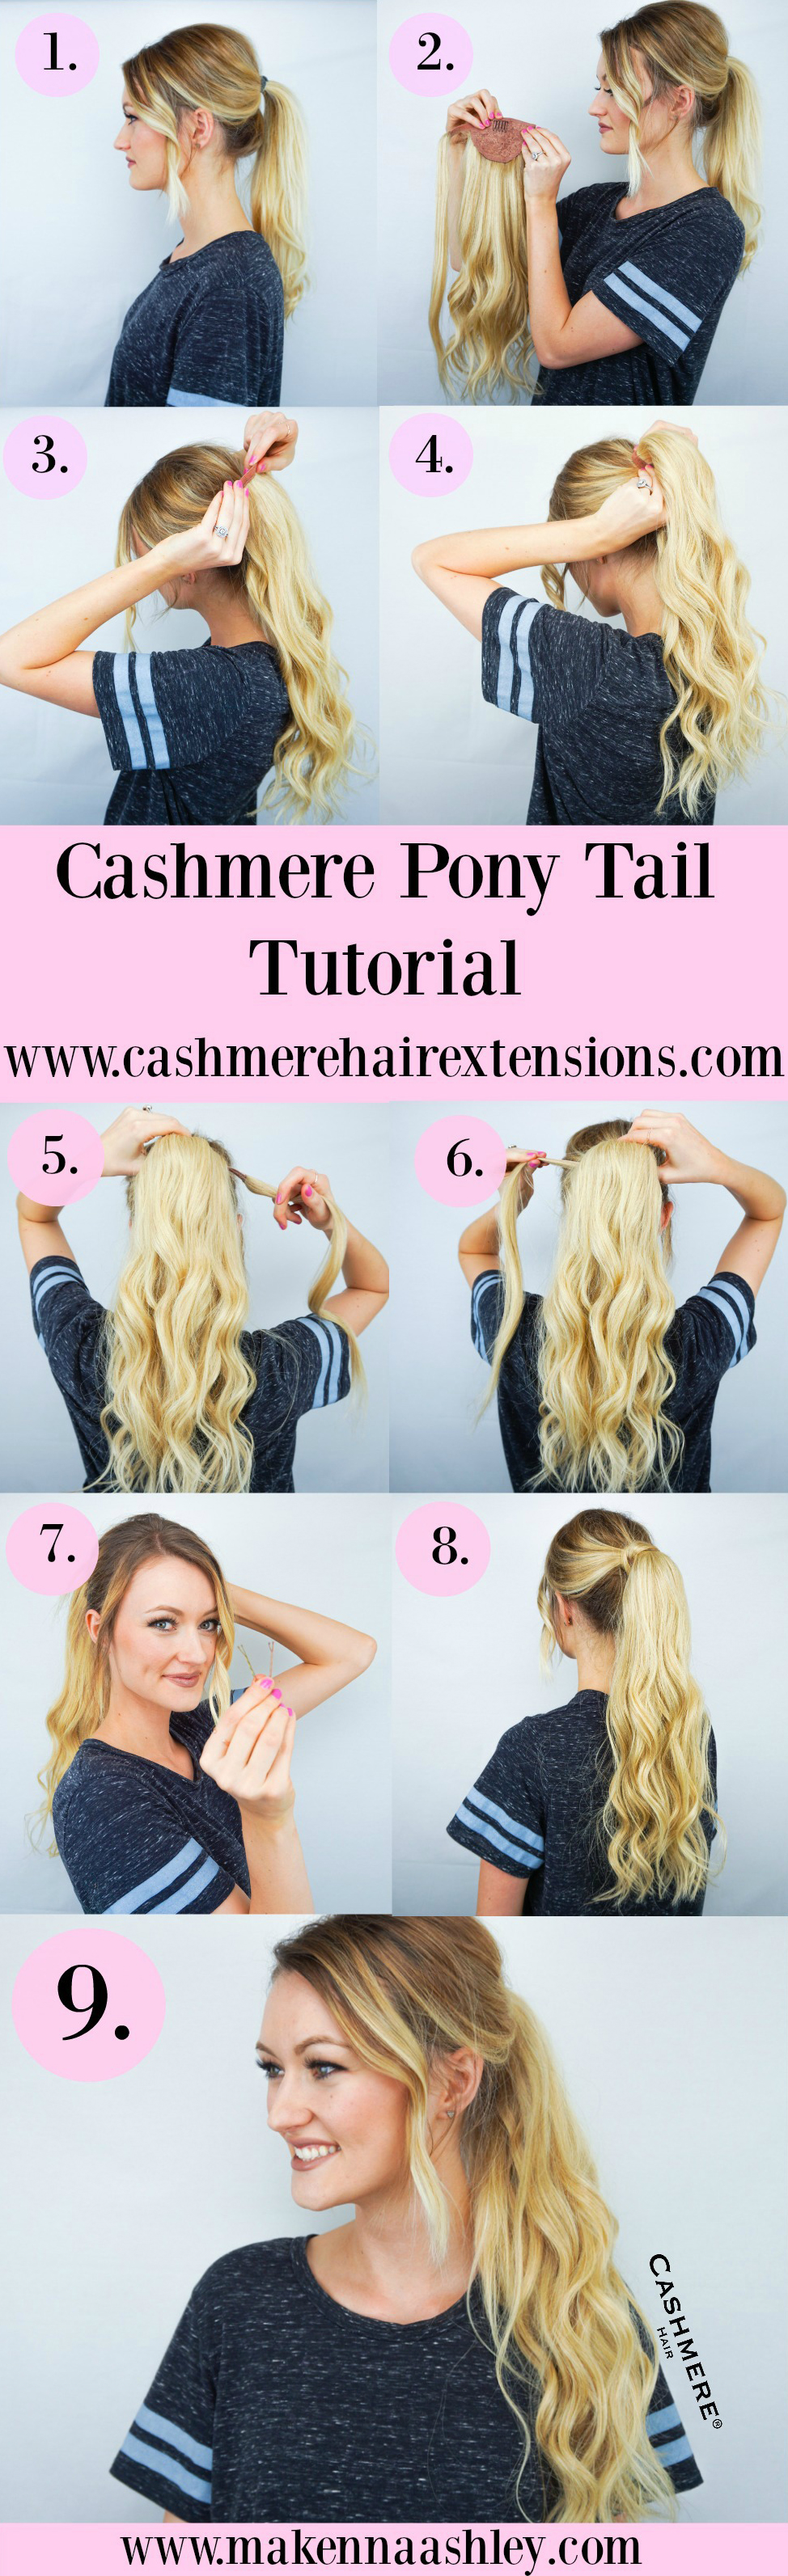
Step 1: Put your natural hair in a ponytail. This pony can be high, low, or in the middle, whatever you prefer! Take out any pieces of hair you want to frame your face.
Step 2: Brush out and style your Cashmere pony tail. I find it easier to already have styled my pony before putting it onto my head, (I love mine curled) as well as making sure it is brushed out so that when you secure it you don't have tangles.
Step 4: Wrap the left side of the weft as tight as possible. Wrapping this tightly will again secure the ponytail for the entire day.
Step 5: Make sure the portion of hair that wraps around the ponytail is tangle free. I like to brush this part out with my fingers, so that when I wrap the ponytail the wrapped portion is smooth and frizz free.
Step 6: Begin to wrap your ponytail starting by going underneath your pony. You want to make sure you are wrapping your pony tail going in the natural direction of the extensions for the smoothest outcome.
Step 7: Secure the wrapped portion with a bobby pin (or two.) I like to use two bobby pins to ensure no sliding or unwrapping throughout the day.
Step 8 & 9: Enjoy your gorgeous and luscious Cashmere Hair ponytail!
~ Click Here to see all the shades for the Cashmere Hair 20" Wrap Ponytail